


Yes, you can still install Windows 10 for free in 2026 using Microsoft’s official Media Creation Tool. No product key is required to install it. Activation is free if your PC previously had a genuine Windows license tied to its hardware.
- Is It Still Legal to Install Windows 10 for Free in 2026?
- Windows 10 System Requirements (2026 Updated)
- What You Need Before You Start
- Step 1 — Download the Official Windows 10 ISO for Free
- Step 2 — Create a Bootable USB Drive (Two Methods)
- Step 3 — Boot Your PC from USB
- Step 4 — Install Windows 10 (Clean Install)
- Step 5 — First Setup and Driver Installation
- How to Activate Windows 10 for Free (4 Legal Methods)
- How to Install Windows 10 as an Upgrade (No USB Needed)
- How to Install Windows 10 on a New PC or Empty Hard Drive
- How to Install Windows 10 on a Mac (Boot Camp & Virtual Machine)
- Windows 10 Common Installation Errors & Fixes
- Is Windows 10 Safe to Use After End of Support?
- Windows 10 vs Windows 11 — Should You Upgrade?
- Frequently Asked Questions (FAQs)
- Final Verdict
Is It Still Legal to Install Windows 10 for Free in 2026?
Yes — completely legal. Microsoft’s official Media Creation Tool remains publicly available and free to download. You can install Windows 10 without entering a product key and use it indefinitely. The only limitation is cosmetic: an “Activate Windows” watermark and restricted personalization settings until you activate it.
Three legal paths exist for a $0 total cost:
| Method | Who It Works For |
|---|---|
| Digital License (tied to hardware) | PCs that previously ran licensed Windows 10 or 11 |
| Old Product Key | Users with a genuine Windows 7 or Windows 8.1 sticker key |
| OEM/BIOS License | Refurbished or pre-built PCs with a license embedded in firmware |
Security Note 🛡️
Microsoft ended free security updates for Windows 10 on October 14, 2025. The OS works fine, but it no longer receives patches for new vulnerabilities. If your hardware qualifies, consider How to Install Windows 11 for Free for better long-term security.
Windows 10 System Requirements (2026 Updated)
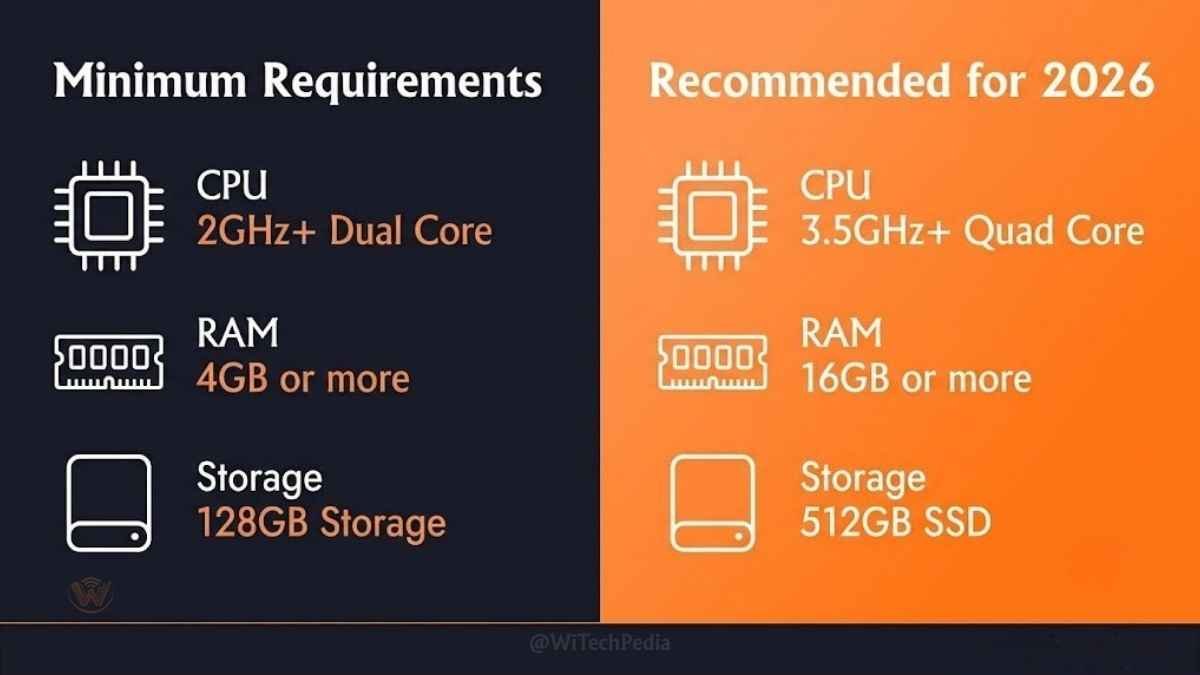
Before downloading anything, verify your hardware can handle Windows 10. These are Microsoft’s official minimums — plus our 2026 recommended specs for a usable experience.
| Component | Minimum | Recommended (2026) |
|---|---|---|
| Processor | 1 GHz, 2 cores, 64-bit | Intel Core i3 / AMD Ryzen 3 or newer |
| RAM | 2 GB (64-bit) | 8 GB |
| Storage | 32 GB free space | 128 GB SSD |
| Graphics | DirectX 9, WDDM 1.0 driver | DirectX 11/12 |
| Display | 800×600 | 1080p (1920×1080) |
| Internet | Required for updates | Broadband |
| BIOS | UEFI or Legacy BIOS | UEFI with Secure Boot |
Pro Tip💡
If your machine has an HDD, installing Windows 10 on even a budget SATA SSD will make it feel three to four times faster. A 120 GB SSD can be found for under $20 and is the single best upgrade for older hardware.
Not sure if your PC qualifies? Open Command Prompt and type msinfo32 to check your current system specs.
What You Need Before You Start
Gather these items before beginning. Missing any one of them mid-install is the most common reason people abandon the process.
- A USB drive: Minimum 8 GB. Everything on it will be erased.
- A working internet connection: Required to download the Media Creation Tool and the Windows 10 files (~5 GB).
- Your Microsoft Account credentials (optional but recommended): Needed for the digital license activation method.
- An old Windows 7 or 8.1 product key (optional): If you plan to activate using the legacy key method.
- 30–60 minutes: The download and install process takes roughly this long depending on your hardware and internet speed.
- A backup of your data: A clean install will erase everything on the target drive. Back up to an external drive or cloud storage first.
Step 1 — Download the Official Windows 10 ISO for Free
Never download Windows from third-party sites, torrent networks, or “mirror” pages. These files frequently contain pre-installed malware, modified system files, or backdoors.
The only safe source is Microsoft’s official website.
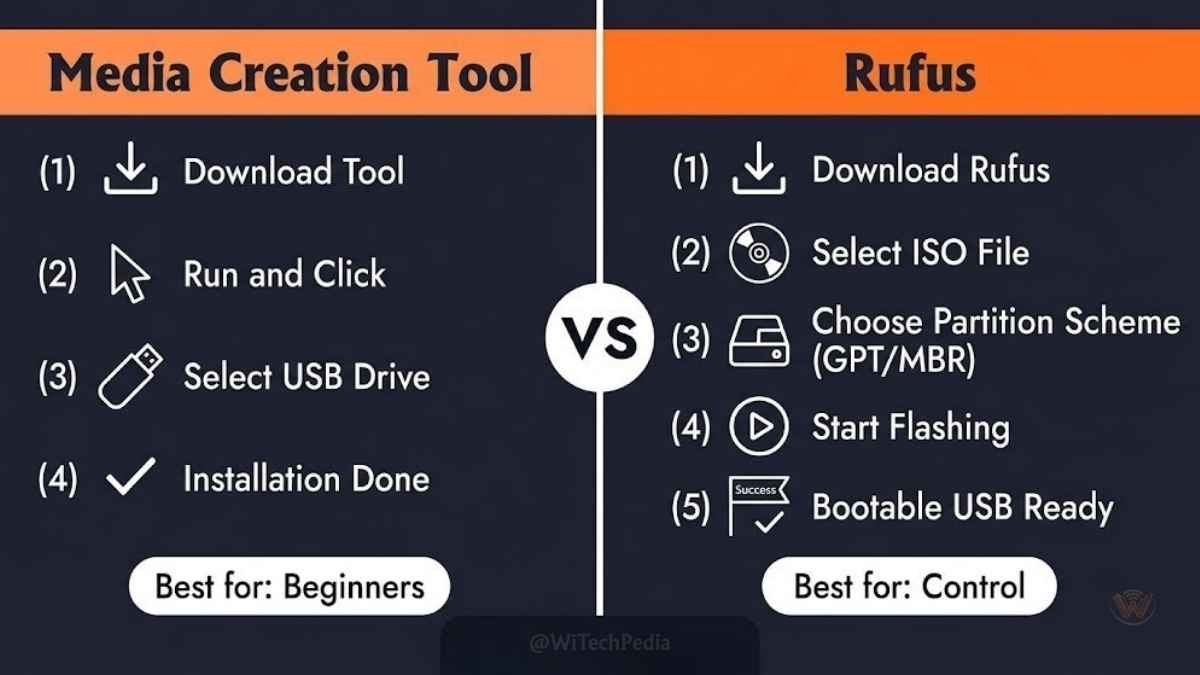
Method A: Using the Media Creation Tool (Recommended for most users)
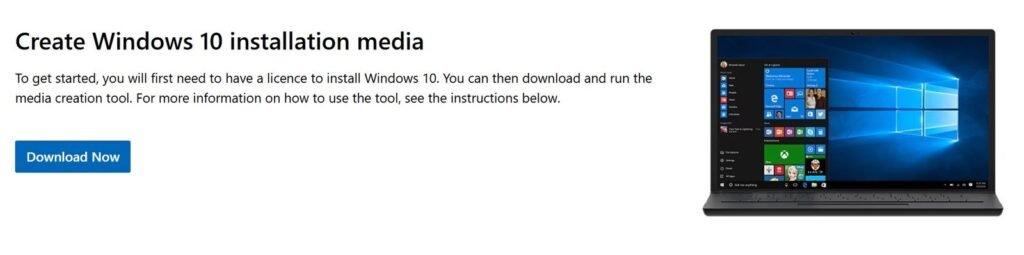
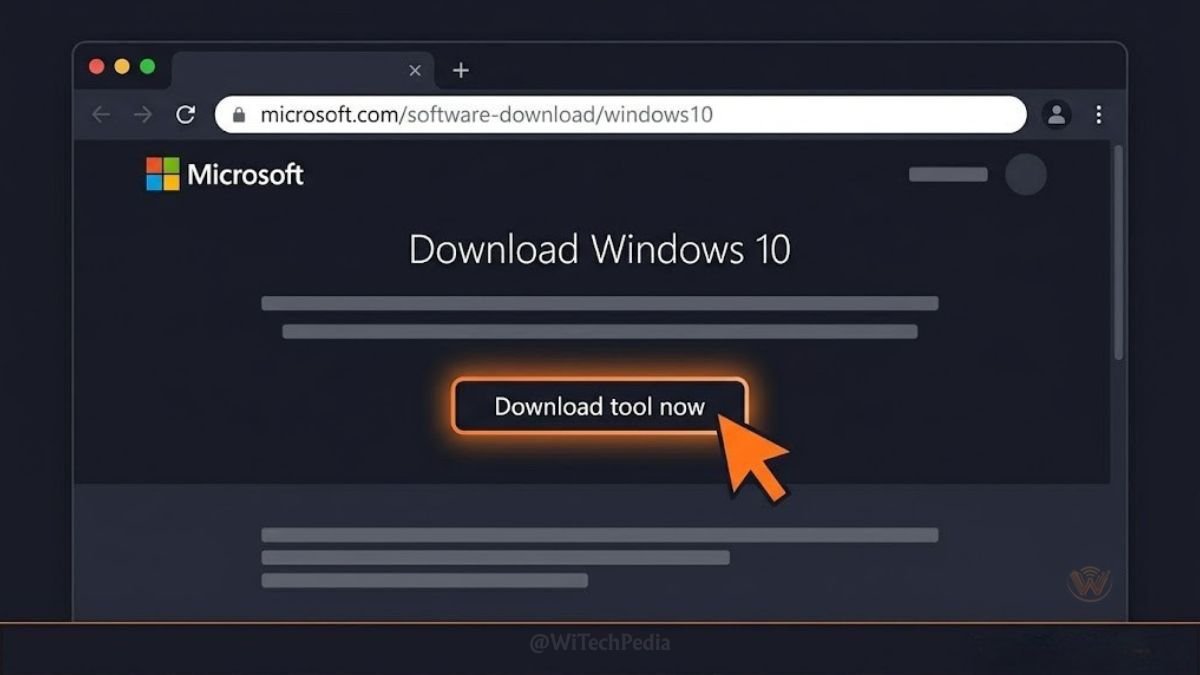
- Open your browser and go to: microsoft.com/en-us/software-download/windows10
- Click “Download tool now” under “Create Windows 10 installation media.”
- Run the downloaded
MediaCreationTool.exefile (accept the UAC prompt). - Accept the license terms.
- Select “Create installation media (USB flash drive, DVD, or ISO file) for another PC” and click Next.
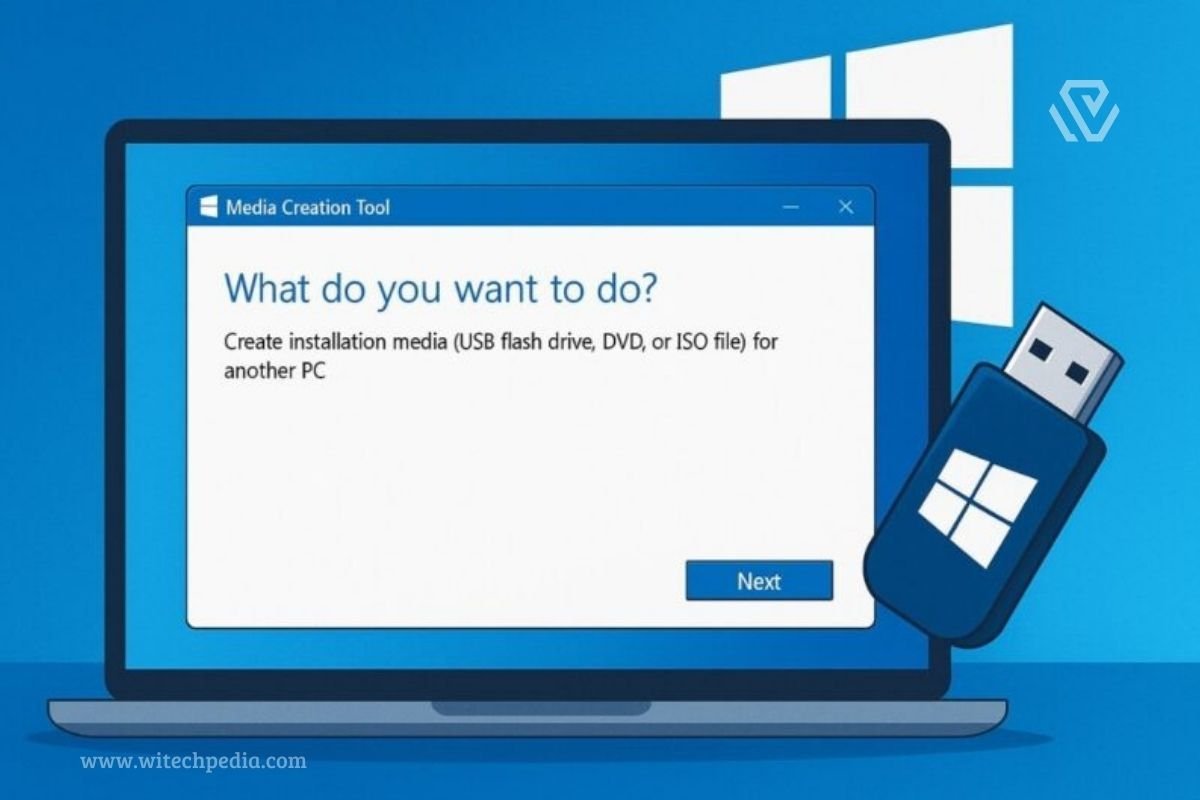
- Choose:
- Language: Your preferred language
- Edition: Windows 10 (Home and Pro are both included)
- Architecture: 64-bit (x64) — recommended for all modern PCs; select 32-bit only for hardware older than 2009
- Select “USB flash drive” and click Next.
- Select your USB drive from the list and click Next. The tool downloads Windows 10 directly from Microsoft and writes it to the USB automatically.
Method B: Download the ISO File Directly
If you want the raw ISO file (for Rufus, virtual machines, or archiving):
- On the Microsoft download page, use a non-Windows browser (Firefox or Chrome on a Mac, or Microsoft Edge in Developer Mode) — this forces the page to show the ISO download option.
- Select the edition, language, and architecture.
- Click 64-bit Download to save the ISO file to your computer.
- The file is approximately 5–6 GB.
📁 What is an ISO? An ISO is a complete disc image — a single file containing everything needed to install Windows 10. You flash it to a USB or mount it virtually to install from.
Step 2 — Create a Bootable USB Drive (Two Methods)
If you used Method A above, your USB is already bootable — skip to Step 3.
If you downloaded the ISO file, use one of these tools to make a bootable USB:
Method A: Rufus (Recommended — Free, Lightweight)
Rufus is the gold standard for creating bootable Windows USB drives.
- Download Rufus from: rufus.ie (it’s a single portable .exe, no installation needed).
- Plug in your USB drive.
- Open Rufus. It will auto-detect your USB drive.
- Under “Boot selection,” click SELECT and choose your Windows 10 ISO file.
- For Partition scheme:
- Select GPT if your PC uses UEFI (all PCs from ~2012 onward).
- Select MBR only if your PC uses Legacy BIOS (very old hardware).
- Leave all other settings at their defaults.
- Click START. Rufus will warn you that all data on the USB will be destroyed — confirm and let it run. This takes 5–15 minutes.
Method B: Windows Built-in Tool (No Extra Software)
- Right-click the ISO file and select “Mount” — it will appear as a virtual DVD drive.
- Open the mounted drive and run
setup.exe— this upgrades your current Windows installation in place (not a clean install).
⚠️ MBR vs. GPT explained: GPT is the modern disk partition format used by UEFI-based systems (post-2012 PCs). MBR is the legacy format. Using the wrong one will cause the installer to fail or not detect your hard drive. If unsure, use GPT.
Step 3 — Boot Your PC from USB
This step requires entering your PC’s BIOS or Boot Menu, which can feel intimidating but is straightforward.
Access the Boot Menu (Fastest Method)
- Plug in your bootable USB drive.
- Restart or turn on your PC.
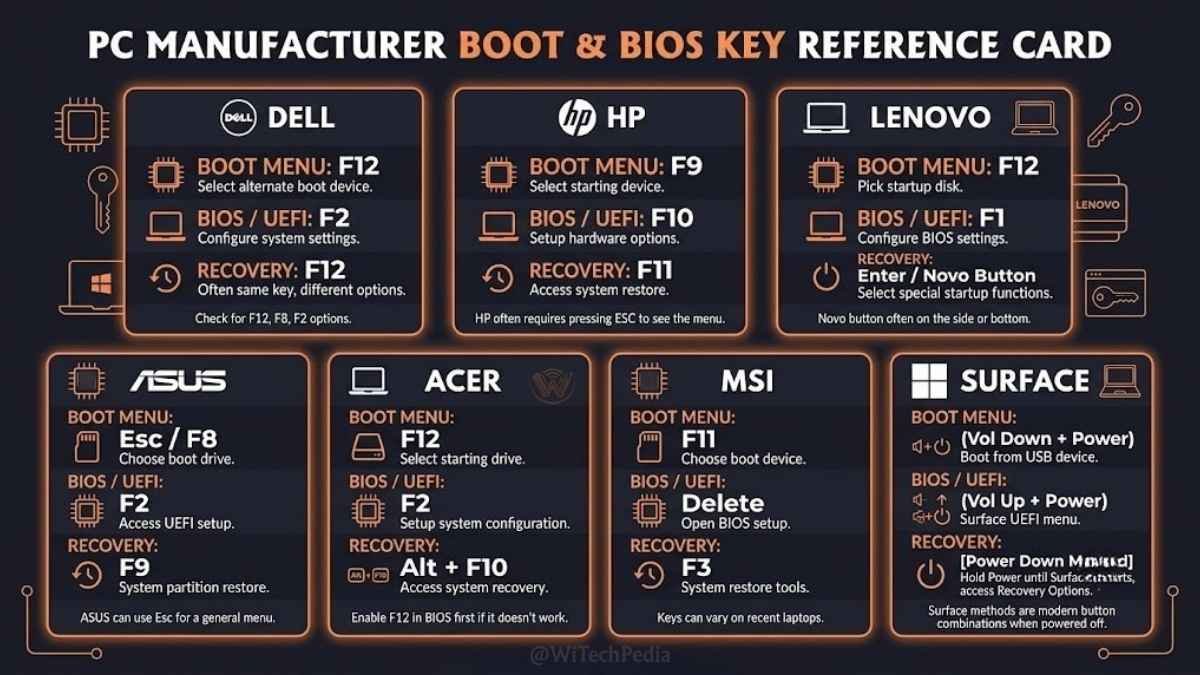
- Immediately press the Boot Menu key repeatedly. The key varies by manufacturer:
| Manufacturer | Boot Menu Key | BIOS Key |
|---|---|---|
| Dell | F12 | F2 |
| HP | F9 or Esc | F10 |
| Lenovo | F12 or Novo button | F1 or F2 |
| ASUS | F8 or Esc | DEL or F2 |
| Acer | F12 | F2 or DEL |
| MSI | F11 | DEL |
| Surface | Volume Down (hold) | Volume Up (hold at boot) |
- Select your USB drive from the boot menu.
- Press Enter. Your PC will boot from the USB, and the Windows logo will appear.
💡 Tip: If you miss the window and Windows loads normally, restart and try again — you have only a 1–2 second window to press the key.
Change Boot Order in BIOS (If Boot Menu doesn’t work)
- Enter BIOS settings using your manufacturer’s key (see table above).
- Navigate to the Boot tab (varies by BIOS).
- Move USB/Removable Drive to the first boot priority.
- Press F10 to save and exit. Your PC will restart and boot from the USB.
Step 4 — Install Windows 10 (Clean Install)
A clean install erases the target drive and gives you a fresh, bloatware-free Windows 10 installation. This is the recommended method.
Step 4.1 — Language and Regional Settings
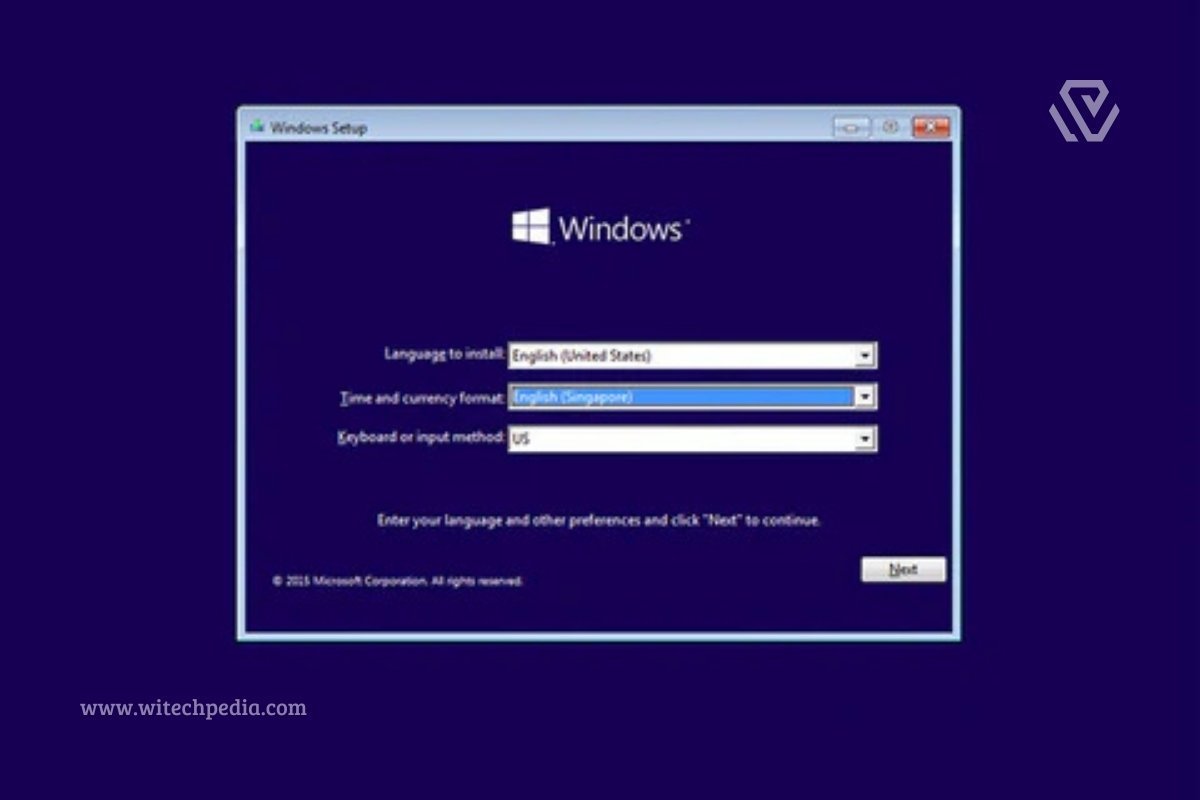
When the Windows Setup screen appears:
- Select your Language, Time and currency format, and Keyboard layout.
- Click Next, then click Install now.
Step 4.2 — Product Key Screen
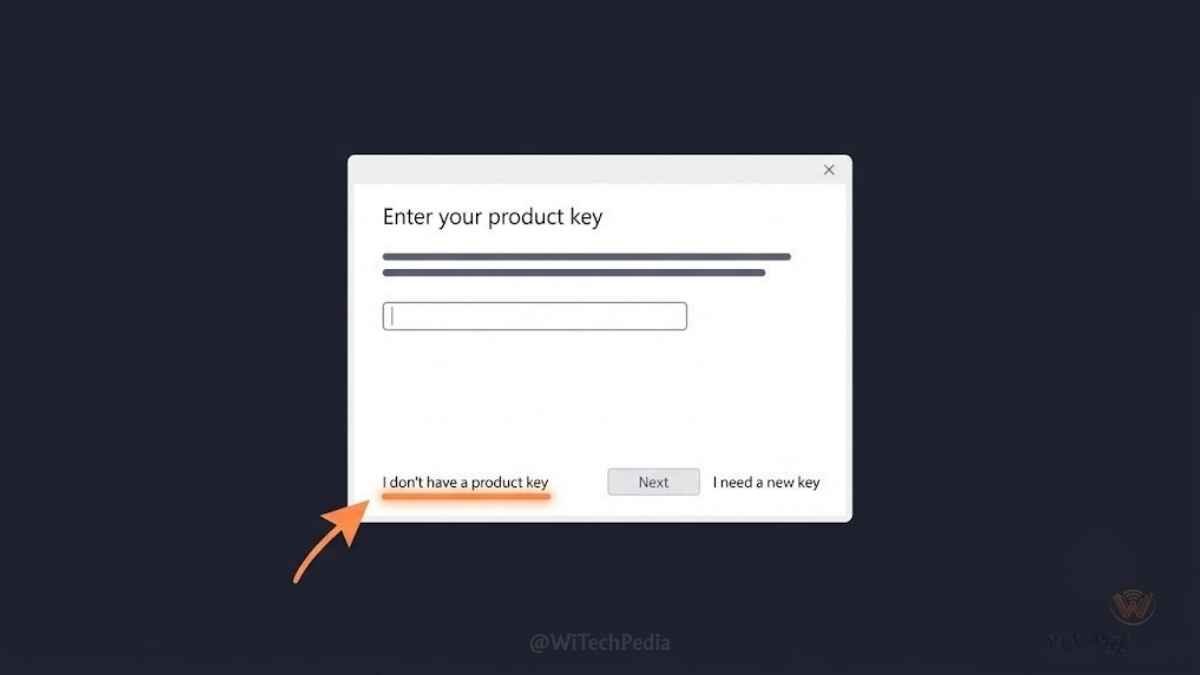
You will be asked to enter a product key.
👉 Click “I don’t have a product key” at the bottom of the screen.
This is the official Microsoft-provided bypass. The installation proceeds in full — the only difference is the activation status, which you can sort out after installation (see Section 9).
Step 4.3 — Choose Your Edition
Select either:
- Windows 10 Home — for personal use on a single PC
- Windows 10 Pro — for business features (BitLocker, Remote Desktop, Hyper-V, domain join)
If you’re unsure, select Windows 10 Home.
Step 4.4 — Accept License Terms
Check the box and click Next.
Step 4.5 — Installation Type
Select “Custom: Install Windows only (advanced)” — this is the clean install option.
Do NOT select “Upgrade” if you want a fresh, clean installation.
Step 4.6 — Drive Selection and Partitioning
You’ll see a list of drives and partitions.
- For a fresh drive: Click on the Unallocated Space and then click Next. Windows will create the necessary partitions automatically.
- For an existing Windows installation: Select each partition one by one and click Delete until the entire drive shows as “Unallocated Space,” then click Next.
⚠️ Warning: Deleting partitions permanently erases all data on them. Ensure your backup is complete before proceeding.
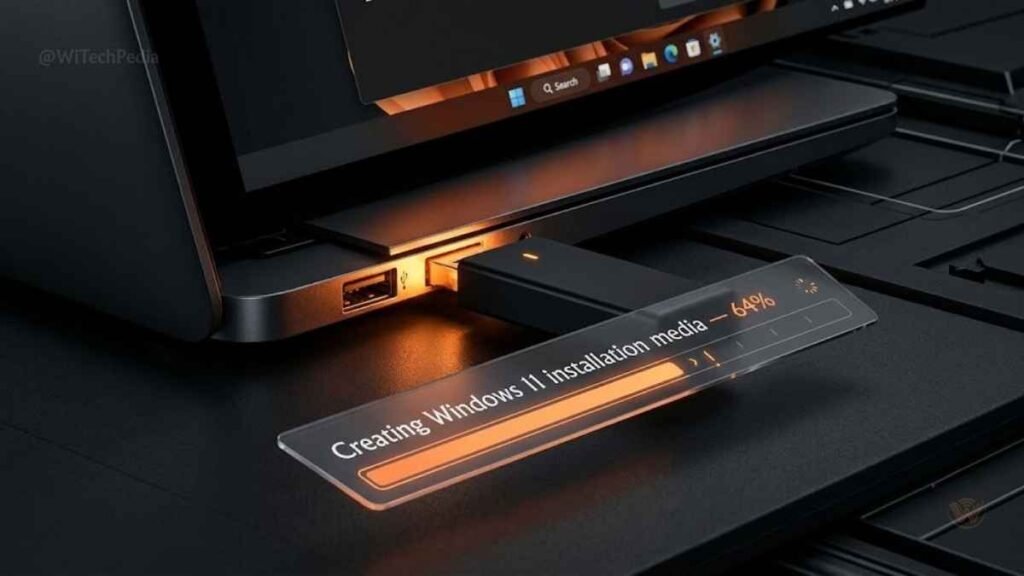
Step 4.7 — Installation Progress
Windows will now:
- Copy Windows files
- Prepare files for installation
- Install features
- Install updates
- Finish up
This process takes approximately 15–30 minutes. Your PC will restart several times — this is normal. Do not interrupt it or remove the USB until the setup asks you to remove it.
Step 5 — First Setup and Driver Installation
After installation completes, Windows will guide you through the Out-of-Box Experience (OOBE):
- Select your region and keyboard layout.
- Connect to Wi-Fi (recommended — Windows will download updates and drivers automatically).
- Set up for personal use or a work/school account.
- Sign in with a Microsoft Account — highly recommended. This links your digital license to your account, enabling free reactivation if you ever reinstall or change hardware.
- Privacy settings: Review each toggle and disable what you don’t need (location, advertising ID, diagnostic data).
- Cortana setup: Optional — you can skip this.
Install Missing Drivers
Windows 10 installs most drivers automatically via Windows Update. For any missing drivers (common with older or specialty hardware):
- Right-click the Start button → Device Manager.
- Any device with a yellow warning icon needs a driver.
- Right-click it → Update driver → Search automatically.
- If that fails, visit your PC/motherboard manufacturer’s support page and download drivers manually.
💡 Pro Tip: For graphics cards, always install drivers from the manufacturer’s website (nvidia.com or amd.com) rather than relying on Windows Update — you’ll get significantly better performance and the latest features.
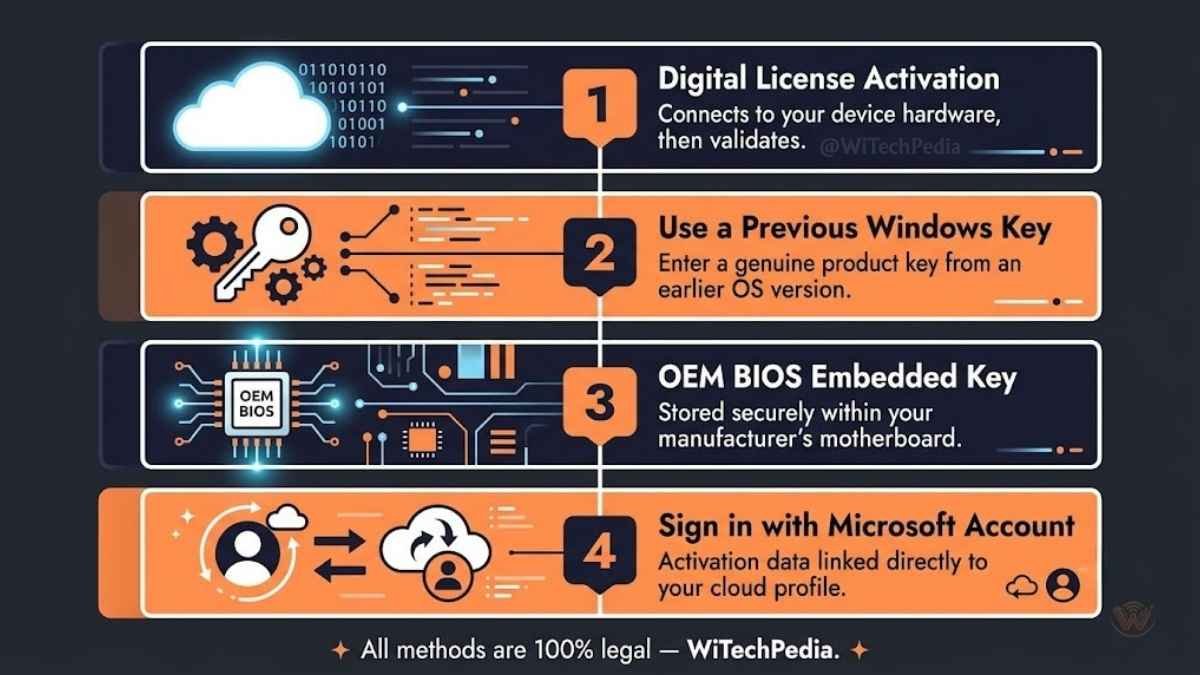
How to Activate Windows 10 for Free (4 Legal Methods)
After a fresh install, Windows 10 runs in an unactivated state. The only functional differences are:
- A persistent “Activate Windows” watermark in the bottom-right corner.
- Personalization settings (wallpaper, themes, accent colors) are locked.
- All other features — security, software, updates — work exactly the same.
Here are your four legal, free activation methods:
Method 1 — Digital License (Fastest & Most Common)
If this PC previously ran a legitimate, activated version of Windows 10 or Windows 11, Microsoft has stored a digital license tied to your hardware’s fingerprint (motherboard ID).
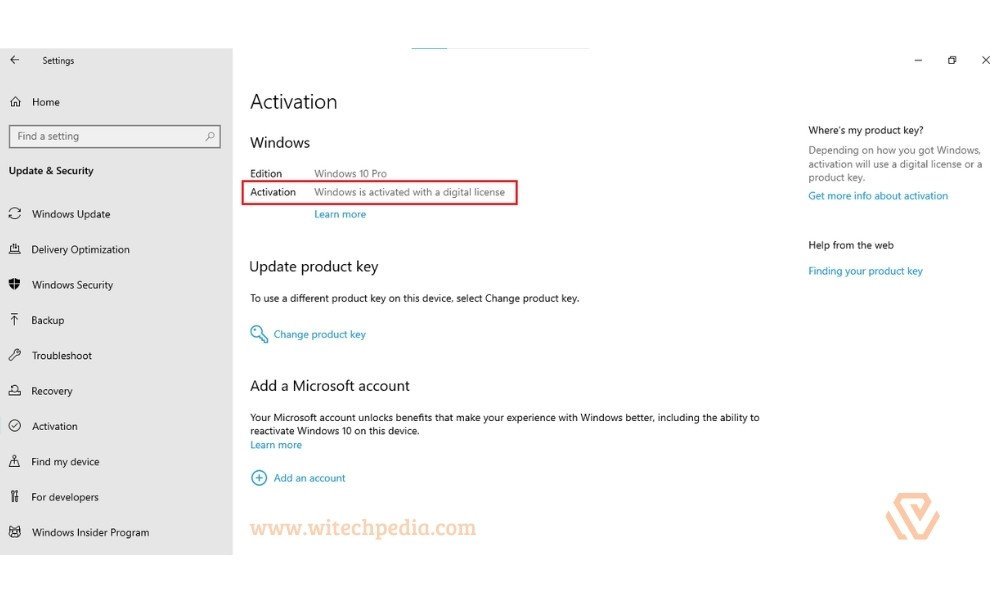
- Connect your PC to the internet.
- Go to Settings → Update & Security → Activation.
- Click Troubleshoot if Windows isn’t activating automatically.
- Select “I changed hardware on this device recently” if prompted.
- Sign in with your Microsoft Account.
- Select this device and click Activate.
Windows should activate within seconds.
Method 2 — Windows 7 or 8.1 Product Key
Microsoft’s back-end validation still accepts valid Windows 7 and Windows 8.1 retail/OEM keys to activate Windows 10 in 2026.
- Locate your old product key (usually on a sticker on the bottom of a laptop or on the side of a desktop tower).
- Go to Settings → Update & Security → Activation → Change product key.
- Enter your 25-character Windows 7 or 8.1 key.
- Click Next. Windows will validate it with Microsoft’s servers and activate.
Method 3 — OEM BIOS / Firmware License
If your PC is a pre-built (Dell, HP, Lenovo, ASUS, etc.) or a refurbished machine, it may have a Windows license embedded in the BIOS/UEFI firmware. This activates automatically when you:
- Install Windows 10 on the same PC.
- Connect to the internet.
- Allow Windows Update to run.
No action required on your part — it activates silently in the background.
Method 4 — Microsoft Account Reactivation (After Hardware Changes)
If you replaced your motherboard or significantly changed your hardware configuration:
- Go to Settings → Update & Security → Activation.
- Click “Add an account” and sign in with the Microsoft Account you used when Windows was last activated.
- Click Troubleshoot → I changed hardware on this device recently.
- Select your device and activate.
✅ Best Practice: Always link your Microsoft Account to your Windows activation (Settings → Activation → Add an account). This lets you recover your license even if you reinstall Windows or swap hardware.
How to Install Windows 10 as an Upgrade (No USB Needed)
If you’re running Windows 7, 8, or 8.1 and want to upgrade to Windows 10 without a USB drive or clean install:
- Download the Windows 10 Media Creation Tool from Microsoft’s website.
- Run it and select “Upgrade this PC now”.
- The tool will download Windows 10 and install it as an in-place upgrade.
- Your files, apps, and settings are preserved.
- The upgrade process takes 45–90 minutes.
⚠️ Note: In-place upgrades can carry over existing software conflicts or registry issues. If your PC has been running slowly or has pre-existing errors, a clean install (Section 7) will always produce a more stable result.
How to Install Windows 10 on a New PC or Empty Hard Drive
Installing on a brand-new drive with no operating system is nearly identical to a clean install, with one difference: the PC has no OS to boot from.
- Create your bootable USB using the steps in Section 5.
- Enter BIOS on the new PC (you may need to enable UEFI mode and disable Secure Boot temporarily for some older drives).
- Boot from USB and proceed with the clean install steps in Section 7.
- When Windows asks for a key, click “I don’t have a product key” and choose your edition.
- After installation, activate using any of the methods in Section 9 — or simply leave it unactivated and use it with the watermark.
How to Install Windows 10 on a Mac (Boot Camp & Virtual Machine)
Option A: Boot Camp (Intel Macs only — macOS Sequoia and earlier)
Note: Boot Camp is not available on Apple Silicon (M1/M2/M3/M4) Macs.
- Open Boot Camp Assistant (found in Applications → Utilities).
- Download the Windows 10 ISO from Microsoft (Section 4, Method B).
- Follow Boot Camp Assistant’s prompts to partition your drive and create a bootable USB.
- Install Windows 10 on the Boot Camp partition.
- macOS will remain on the primary partition; you switch between them by holding Option at startup.
Option B: Virtual Machine (All Macs, including Apple Silicon)
Use virtualization software to run Windows 10 inside macOS:
- Parallels Desktop (paid, best performance on Apple Silicon)
- VMware Fusion (free personal edition available)
- VirtualBox (free and open-source — best for Intel Macs)
Steps:
- Download the Windows 10 ISO.
- Create a new virtual machine in your chosen software.
- Point it to the ISO file when prompted for installation media.
- Proceed with the standard installation steps.
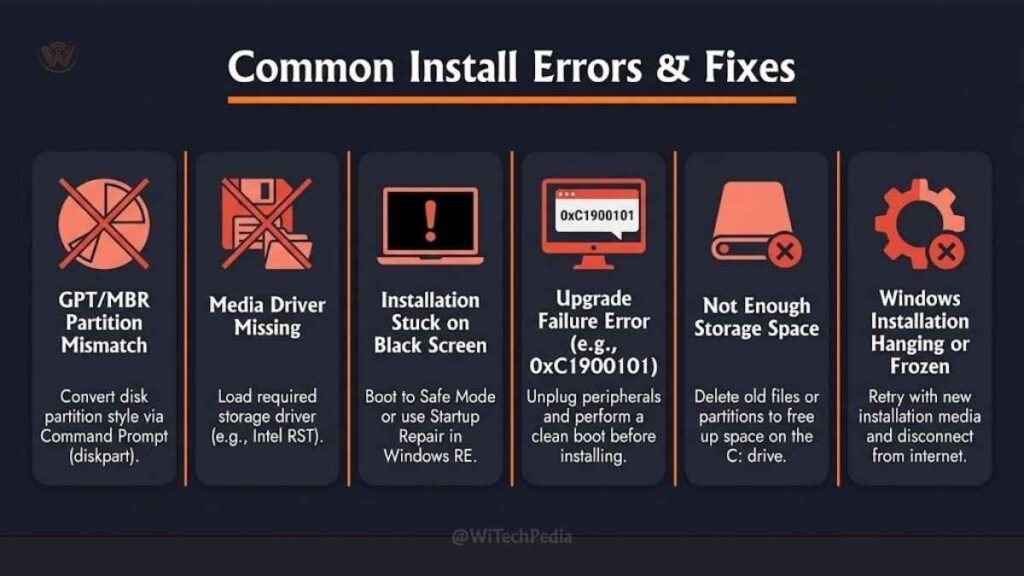
Windows 10 Common Installation Errors & Fixes
| Error | Likely Cause | Fix |
|---|---|---|
| “Windows cannot be installed on this disk (GPT)” | Drive is GPT but BIOS is in Legacy mode | Switch BIOS to UEFI mode, or reformat USB with MBR in Rufus |
| “A required CD/DVD drive device driver is missing” | USB 3.0 port incompatibility | Move USB to a USB 2.0 port, or add USB drivers to the ISO |
| “Windows could not complete the installation” | Setup loop error | Boot from USB again and select “Custom install” → delete all partitions |
| “This PC can’t run Windows 10” (during upgrade) | Hardware doesn’t meet requirements | Check against the table in Section 2 |
| Blue Screen during install (BSOD) | RAM error or driver conflict | Run MemTest86 to test RAM; try a different USB port |
| PC won’t boot from USB | Boot order incorrect | Enter BIOS and move USB to first boot priority |
| Setup hangs at “Getting files ready” | Corrupt ISO or slow USB | Re-download the ISO and re-flash to a different USB drive |
| “Error 0x8007025D” | Corrupt installation media | Re-create your bootable USB using a fresh ISO download |
| Activation error 0xC004F213 | Hardware change detected | Use Method 4 in Section 9 (Microsoft Account reactivation) |
Is Windows 10 Safe to Use After End of Support?
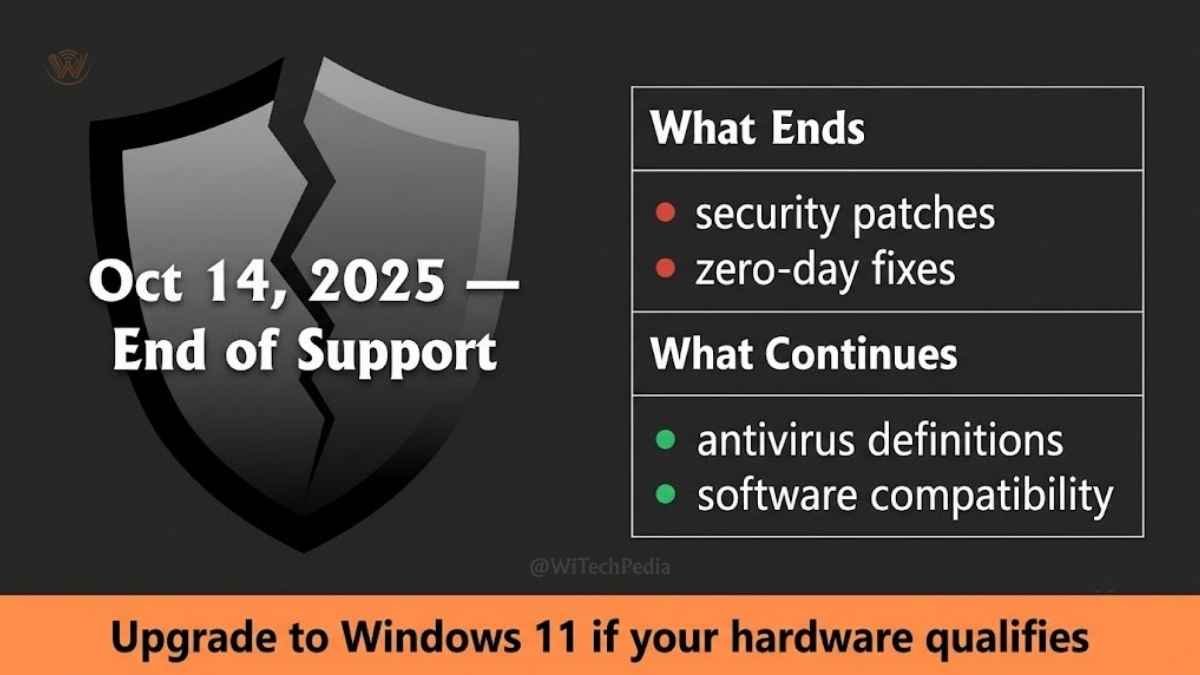
Microsoft ended free security updates for Windows 10 on October 14, 2025. This is a real security concern that deserves an honest answer.
What “End of Support” means in practice:
- No more free monthly security patches from Microsoft.
- New vulnerabilities discovered after October 2025 will not be patched on Windows 10.
- Microsoft still provides Extended Security Updates (ESU) — but these are paid, aimed at businesses, and cost $30–$61 per year per device.
Practical risk assessment:
- If you use your PC for light tasks (browsing, documents, media), the risk is moderate but manageable.
- If you do online banking, handle sensitive data, or use your PC at work, the risk is higher.
- Keeping a strong antivirus (such as Bitdefender, Malwarebytes, or even Windows Defender) mitigates but does not eliminate the risk.
Our recommendation:
If your PC supports it, upgrade to Windows 11 for free. If your hardware is too old for Windows 11, consider installing Windows 11 on unsupported hardware using the workaround method, or switch to a lightweight Linux distribution like Linux Mint, which remains fully supported.
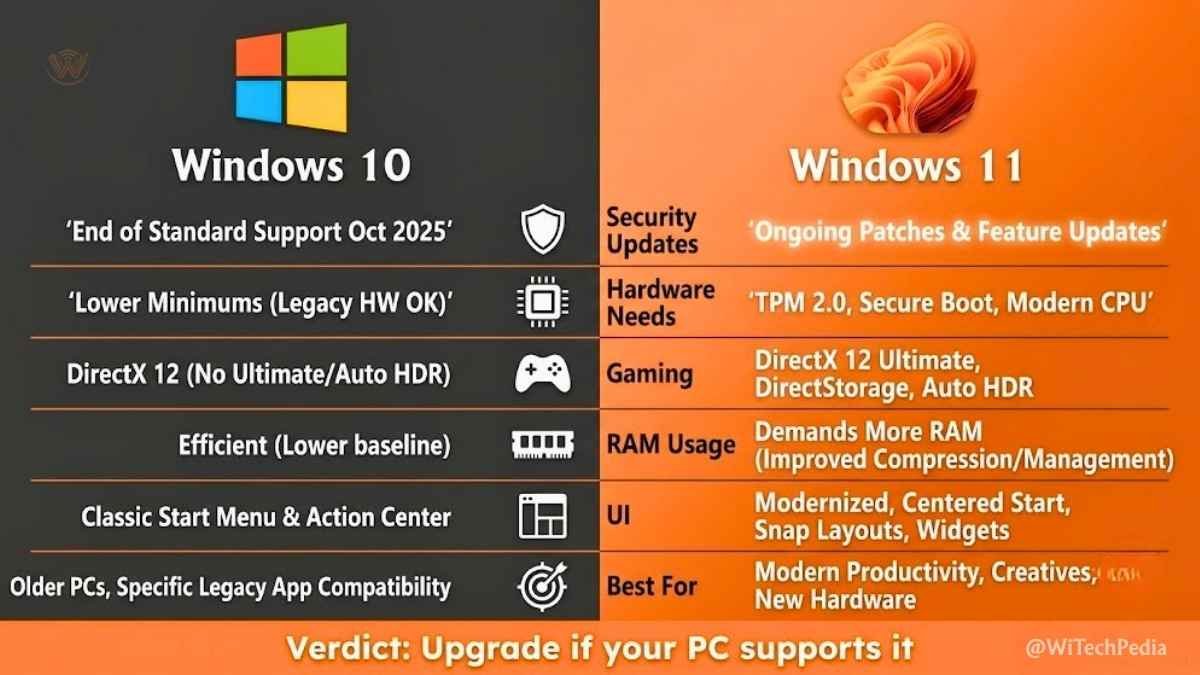
Windows 10 vs Windows 11 — Should You Upgrade?
| Feature | Windows 10 | Windows 11 |
|---|---|---|
| Security updates | Ended Oct 2025 | Active through ~2031 |
| TPM 2.0 requirement | Not required | Required |
| RAM requirement | 2 GB minimum | 4 GB minimum |
| Start Menu | Familiar left-aligned | Centered (redesigned) |
| Android app support | No | Yes (via Amazon Appstore) |
| Gaming (DirectStorage, Auto HDR) | No | Yes |
| Performance on older hardware | Better | Lower (more demanding) |
| Cost | Free | Free (upgrade from Win 10) |
Verdict: If your PC meets Windows 11’s requirements (and especially has TPM 2.0), upgrading is the right call for security and longevity. If it doesn’t meet requirements, Windows 10 is a perfectly usable OS for light work — just add a third-party antivirus and avoid high-risk activities.
Frequently Asked Questions (FAQs)
Is it legal to install Windows 10 without a product key?
Yes. Microsoft’s Media Creation Tool allows you to install Windows 10 without entering a product key. The OS is fully functional. “Activation” only unlocks cosmetic personalization features and removes the watermark — it does not gate security or software features.
Can I still download Windows 10 from Microsoft in 2026?
Yes. As of June 2026, the Microsoft Software Download page for Windows 10 remains live and the Media Creation Tool is still available for download at no cost.
Will I lose my files if I install Windows 10?
Clean install: Yes — all data on the target partition is erased. Back up first.
Upgrade install (from Windows 7/8/8.1): No — your files and apps are preserved. However, some apps may need reinstalling.
How long does Windows 10 take to install?
Typically 20–40 minutes for the installation itself, plus 10–20 minutes for the initial setup. Total time from start to a usable desktop: approximately 45–60 minutes on an SSD, longer on an HDD.
Can I go back to Windows 10 from Windows 11?
Yes, within 10 days of upgrading. Go to Settings → System → Recovery → Go back. After 10 days, you’ll need to perform a clean install using the steps in this guide.
Does Windows 10 still get virus definition updates?
Windows Defender antivirus definitions (the malware signature database) will continue to update. What ends is the patching of operating system vulnerabilities — i.e., the exploits that attackers use to break through the OS itself.
What edition of Windows 10 should I install — Home or Pro?
Home is sufficient for most personal use. Pro adds: BitLocker disk encryption, Remote Desktop (host), Hyper-V virtualization, Group Policy editor, and the ability to join a Windows domain. Choose Pro if you work remotely, handle sensitive data, or need virtualization features.
Can I install Windows 10 on a PC with 2 GB of RAM?
Technically yes — 2 GB meets the minimum requirement. In practice, 2 GB in 2026 is extremely tight. Windows 10 itself uses roughly 1.5–2 GB at idle, leaving almost nothing for apps. Add at least 4 GB before installing for a usable experience.
What happens if I skip activation entirely?
The OS remains fully functional indefinitely. You’ll see a persistent watermark in the bottom-right corner, and personalization settings (desktop background, themes, accent colors) will be locked. Everything else — software, security, updates, and performance — is unchanged.
Can I use a Windows 11 key to activate Windows 10?
No. Windows 11 and Windows 10 use separate product key pools. A Windows 11 key will not activate Windows 10. However, Windows 7 and Windows 8.1 keys still work for Windows 10 activation.
Final Verdict
Installing Windows 10 for free in 2026 is entirely possible, completely legal, and takes less than an hour from start to finish. Microsoft’s own tools make the process straightforward — download the Media Creation Tool, create a bootable USB, click “I don’t have a product key” during setup, and you’re done.
The three things that matter most:
- Always use Microsoft’s official download — never third-party ISO sites.
- Back up your data before a clean install — there is no undo.
- Be aware of the security tradeoff — Windows 10 is past its security support date. Use a reputable antivirus and consider upgrading to Windows 11 if your hardware allows it.
For most users on older hardware that can’t run Windows 11, Windows 10 remains a solid, stable, and fast operating system that will serve you well for years to come.